
This Element is still Under Construction!
So you want to build a motor controller assembly that can swim to about 50 feet deep? OK, here are the parts you will need:
available from Radio Shack
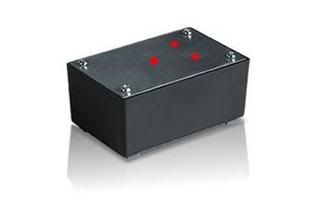
1 project box 6"x4"x3" Model: 270-1806 Catalog #: 270-1806
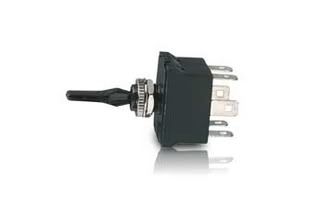
3 double pole double throw switches (momentary contact)
Model: 275-709 Catalog #: 275-709
1 fuse holder Model: 270-1217 Catalog #: 270-1217
1 fuse, 20 amp Model: 270-1074 Catalog #: 270-1074
1 set bananna plugs PN# 274-721
available from Home Depot
160 feet speaker wire ( 16 gauge,2 conductor) I like the kind that has two different colors of wire but eiether will work.
wire nuts (2)
hose clamps
pvc cutter
sheet metal screws
3 10/24 screws in brass or stainless steel
Thruster Components
3 Mayfair bilge pump cartridges 500gph,(you want the replacement cartridges) available at Cabela's
3 prop adapters from Master Airscrew available at Tower Hobbies
3 Octura propellers from:
Octura Models Inc 7351 Hamlin Ave Skokie, IL 60076 (847) 674-7351
The part numbers you need are listed below:
1250 PL (left-hand)
1250 RPL (right-hand) Use 2 of one and 1 of the other
If you call Octura you can order the parts. The lady I spoke with was very nice, and very helpful! You must send them a check and then they will ship out the parts. It sounds cumbersome but I got my parts in under a week.
Other items you will need include:
You will also need some tools,and a healthy dose of patience if this is the first time you've tried to do something like this! The next installment will cover tools, tool safety, and if time and space allow, we will start to build.
Go shopping! Have fun! While you're at the store I'll try to figure out what exactly I want you to do next.
You will use the short pieces to wire the switches.
A,B,C,D,E,and F are the pins. Vs and Vo are battery positive and battery negative.
Solder 4 in. wires at B, C, E, and F. I will try to find a better diagram but in the meantime, A, B, and C are on the left side of the diagram going top to bottom, and D, E, and F go from top to bottom on the right. B and E will be the power and ground wires. If you got the speaker wire with different colored conductors then at pins B and E, use one color for all the B's, and the other for all the E's. This will make your life easier down the road.

Thread the three 50 foot motor wires that you cut from your speaker wire through the hole in the end of your project box.
What! There is no hole??? Take a drill with a spade bit of the appropriate size and make one! Do be careful to clamp your work so you drill the box, not the table, yourself or the friend who is helping you. And pleeeeeze wear safety glasses!

Seperate the ends of the conductors and strip the ends of them back about 1/4 inch. Twist one motor wire and the wire coming from C together and insert them in the hole in pin D.
Solder the wires in place.
Twist the 4 in. wire coming from F with the other motor wire an insert them into the hole in pin A. Solder these wires in place too. You will connect the power and ground wires after the switches have been installed in the project box.
I like to solder everything on the switches before I install them in the top of the project box as I hate trying to solder in close quarters.
Next drill holes in your project box. Size your drill bit to match the size of the threaded shaft on the switch. The switch shown here is slightly different than the one you'll be using but the threaded part shows up better.

Remove the knurled ring and the nut from the threaded shaft of the switches and install them into the project box.
Take your Mayfair bilge pump cartridges and remove the impellers.
 The impeller is the flat white disc with fins on it at the bottom of the pump. Gently pry the impeller off of the motor shaft. Be careful when you do this so that you don't bend the motor shaft. If you can't get the job done with your fingers, use a flathead screwdriver and gently work all around the disc until it lifts off.
Once the impeller is off take a close look at the motor shaft. It has a little flat spot on it. When you put the prop adaptor on, the set screw will line up with the flat on the motor shaft and keep the propeller from "freewheeling".
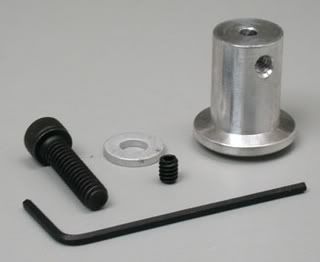
Take the prop adaptor out of its bag and put it in a bowl or shallow dish. It has a small set screw and an allen wrench that have been known to mysteriously dissapear if they aren't watched carefully. Keeping then contained in a bowl or something is a good idea.
This is the prop adaptor:


